
Being as this is the last day of 2016 it is fitting that I finish off the year with one last project. If you have been following my blog over this past year or longer you will have seen one of my earlier projects which was a work table spray booth. I have been using the spray booth now for a couple of weeks and I wish that I had built it years ago. It's a great tool but with it comes a minus. That being that the booth is awkward to move in or out of the workshop. It's not terribly heavy just a big piece to move by myself. With that in mind the utility cart project was started a couple of weeks ago and completed today. So let's check it out.

As usual I start out my projects by designing them in my computer using CAD software. In this case the project was designed using Fusion 360 software from Autodesk. (It's free by the way. Get a copy online for your next project.) The cart had to be large enough for the spray booth and the window ventilation insert so I designed the cart with a flat top so the booth could of course sit on top. I also made the second shelf lower so that I could put the window insert through the openings between the top of the cart and the second shelf. I also wanted a nice handle to top everything off.

Part# Part Dimensions Number Needed
1. 23" x 3.5" (3)
2. 2.5" x 31.5" (4)
3. 3" x 18" (6)
4. 3" x 31.5" (2)
5. 3" x 28.5" (2)
6. 3" x 30" (4)
7. 3" x 37" (2)
8. 4" x 5" (4)
Here is an image of the cut layout for all of the pieces for the utility cart along with the dimensions and number of parts needed for each piece. The entire cart can be built using only one 4' x 8' x 3/4" sheet of plywood. From the cutting diagram above I was able to first cut all the parts out using my table saw. This could also be done using a circular saw. Once this was done I sanded all of the parts smooth using an orbital sander. This took a little time but paid off big as it saved me the hassle of having to sand the cart once it was assembled which would have been much more difficult to do.

I started assembly with the front of the cart. This consisted of two #2 pieces (2.5" x 31.5") and three #3 pieces (3" x 18") laid out as you see above.


Using a Kreg pocket hole jig I drilled all the holes that I needed for the first assembly. The Kreg jig is as simple to use as a pencil sharpener and gives you perfect pocket holes every time. Another tool that makes this project a simple one to complete.

I then glued, clamped and screwed the assembly together. Once the screws are in place the clamps can be removed and the assembly set aside. This made putting the cart together a fast and simple process. I made two assemblies like this one and set them aside when completed and moved forward.

The next part of the assembly was to work on the sides of the cart. This consisted of one #4 part (3" x 31.5"), one #5 part (3" x 28.5"), two #6 parts (3" x 30"), and one #7 part (3" x 37"). This last part I tapered on the end that sticks out in the photo above to make a nice transition for the handle that would be added later. I measured the end length that was sticking out and tapered the ends inward by a half and inch. (Check out the later photos of the completed cart to see how this ended up looking.)

Here are all of the sides that were needed for the utility cart. The taper on the top side parts that I just spoke of you can see in the photo above. This taper cut needs to be done before the side assemblies are put together. Once this is done assembly is completed just like the front and back assemblies with pocket holes, glue and clamps. Again these assemblies were set aside until final assembly of the cart started.
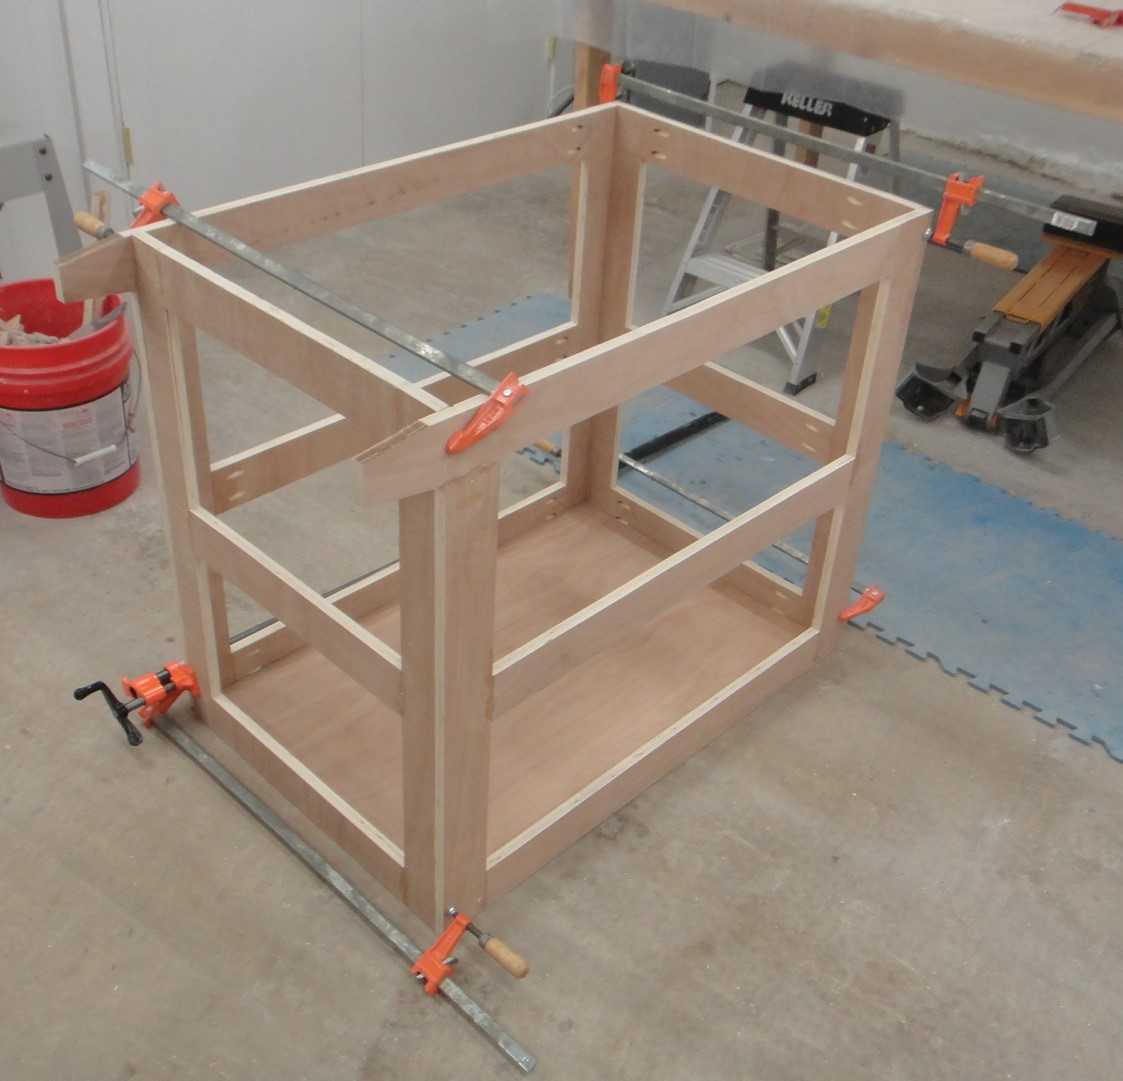
Here I started clamping the sides together along with the bottom panel in place. The top of the cart as well as the shelves are all the same size. This being the # 1 parts (23" x 35"). I was happy at this point that all the care I had taken in cutting all the parts out was right on the money and the fit-up looked good.

I moved the first part of the final assembly up on my work table and started to glue, clamp, and screw the sides to the front assembly and the bottom shelf panel. You can still see the clamp on the back of the assembly in the photo above. The bottom panel was only put into position to keep the frame of the cart nice and square while the sides and front/back panels were assembled together.

Once I was happy with the framework of the cart I placed it back on the floor and clamped, glued and screwed the bottom shelf into place. You can see all of the pocket holes that were need in this bottom panel in the photo above. The pocket holes were place around four inches apart. I took a while to put the holes in it but again was a simple process to complete.
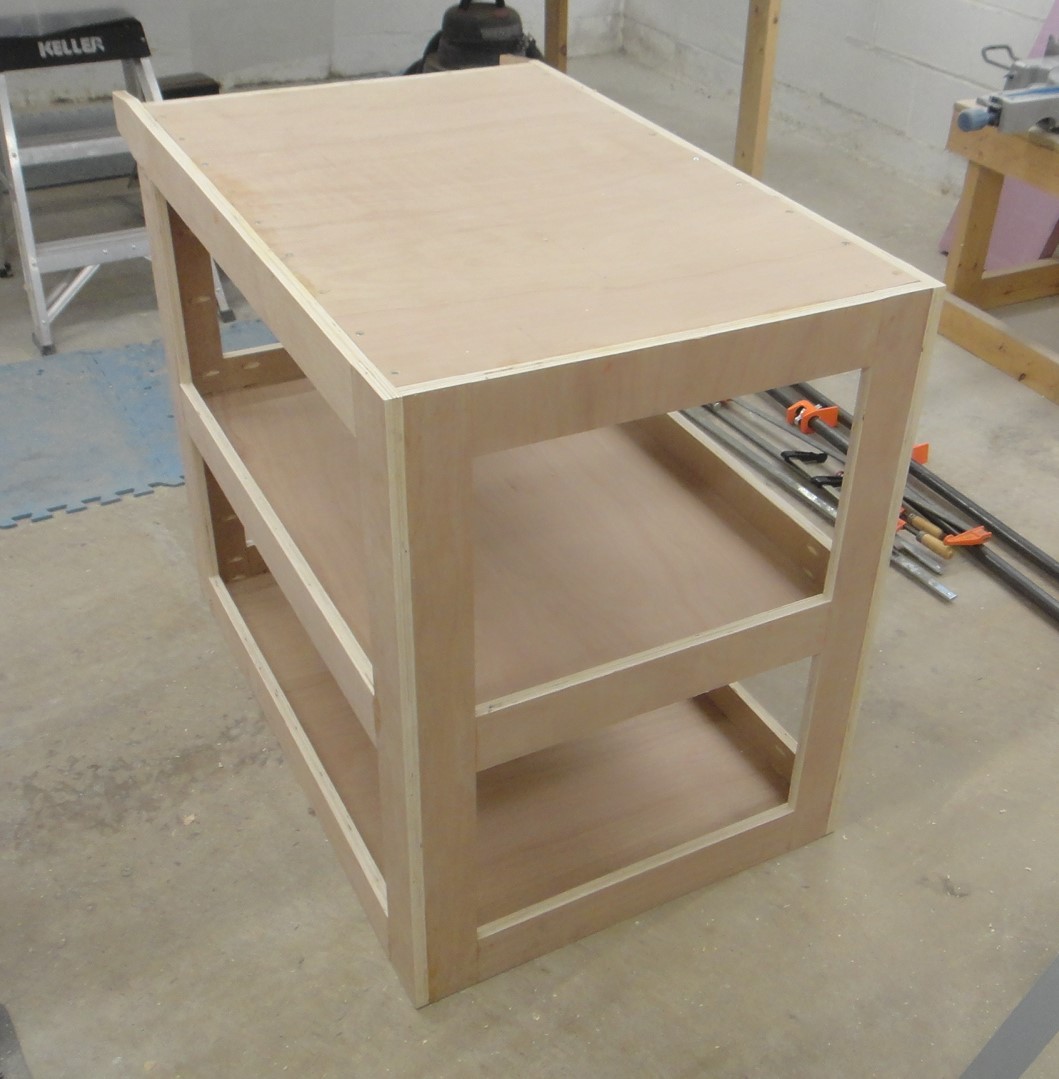
Here the cart assembly is nearly complete with the middle shelf and the top surfaces installed the same way the bottom shelf was. I made sure all the pocket holes were on the bottom surfaces of the shelf panels so I could get a nice clean look when it was assembled. The only other thing that I had installed in this assembly was two small strips of wood that ran the length of the cart from front to back underneath to top surface. These I glued in and screwed in from the underside and the topside of the top surface using 1 1/4 wood screws. Again I have a close up view of this in a later photo in this post. This was needed as the pocket screws caused problems with the top surface being flush with the sides of the cart frame. Simply was not enough material to allow the screws to not poke out of the outer surface of the frame. If the top surface of the cart was recessed like the shelves the pocket holes would have worked fine. I just needed the cart to have a flat deck on the top so I had to have the extra bracing to get it to work the way I needed it.

With all of the major assemblies of the cart put together and assembled to each other I turned the cart upside down to mount the caster blocks as shown above. I had some scrap 3/4" plywood that I had used but realized after I had mounted these that I could have cut them out of the original 4' x 8' panel in the first place. But this worked just the same.

I glued and screwed the mounting blocks onto the base and then screwed the casters on to the blocks. Two caster for the front of the cart swivel and the two back ones remain stationary. All of them using 3" wheels.

Next came the steps needed to install the handle for the cart. I traced out the shape of the overhang on the upper rails of the top of the cart. I cut these two pieces into shape with my bandsaw and then drilled a 1" diameter hole for the 21 5/8" x 1" long wooden dowel. Along with this larger hole I need two more smaller holes that I counter sunk for the 1 1/4" wood screws to mount the blocks in place.

To install the handle all I needed to do was insert the dowel into the holes of the mounting blocks. I then applied glue to these block and moved the assembly between the overhanging parts of the top of the cart. I slid the mounting block outward to mate up to the overhangs and then screwed them into place. I clamped the ends of the blocks to get a nice tight fit. After the glue had dried I used my orbital sander and evened everything out and rounded the outer corners off to get the shape that you see here. Turned out better than I had hoped which is always a good thing in any project.
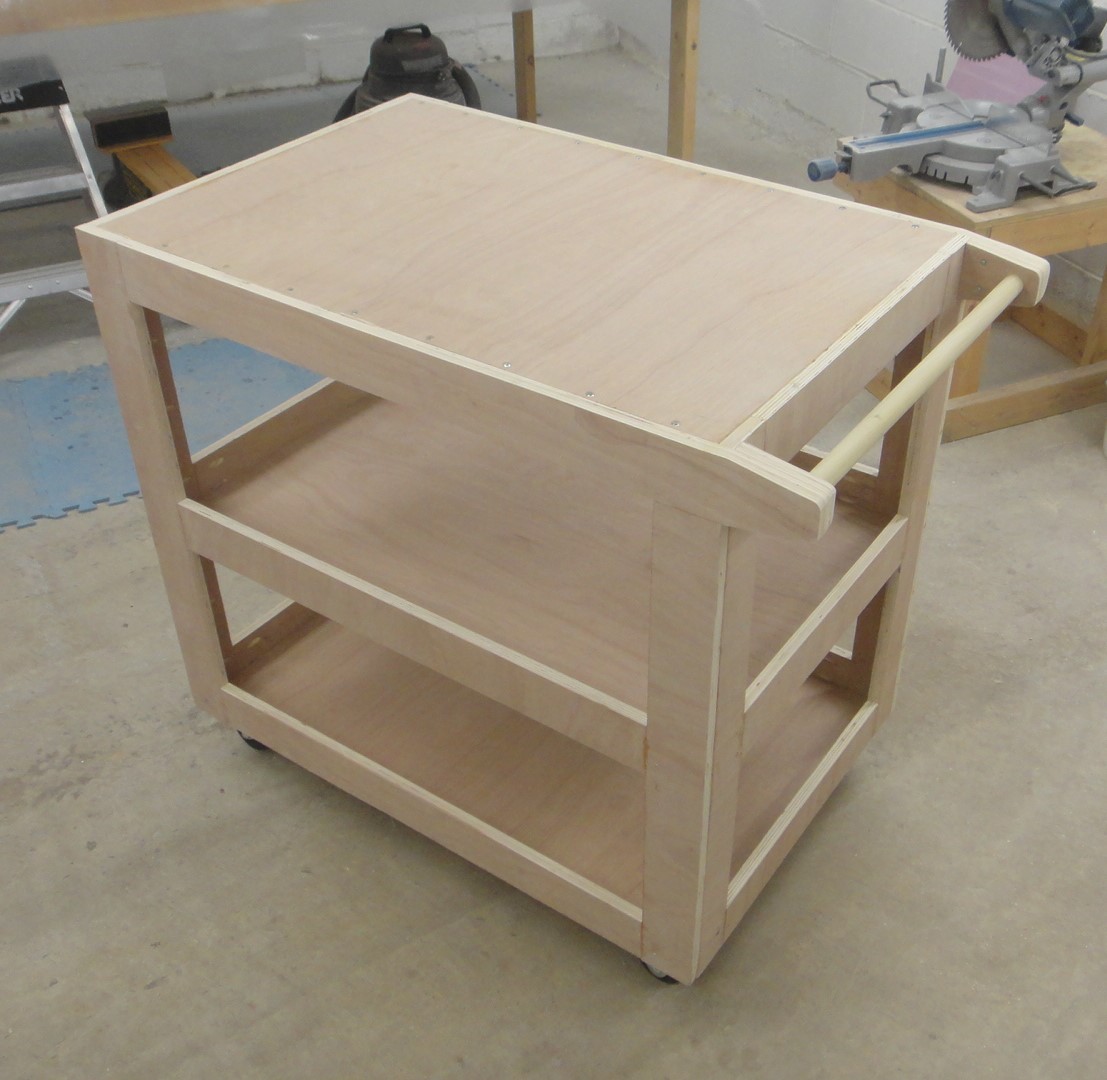
This is how the cart looked just before painting. I was very pleased with my efforts at this point. A nice new cart that should serve me well in the coming years in the shop.

After painting a couple nice coats of red paint this is how the cart really came to life. I was fortunate enough to find a rubber mate that was exactly 2' x 3' in size for the top of the cart and had some left over vinyl wrap from a previous project to black out the handle as well. Pretty spiffy don't you think?

The rubber mate is a good thickness and will protect the top surface of the cart when I haul stuff on it. I have not found rubber mats for the inside of the cart but I am sure I can come up with something if I put my mind to it. The top mat was only $7.00 so it was a good deal.

The casters for the cart work well and it's going to be perfect for the job I need it for. The cart is 24" wide, 40" long with the handle and 36" tall. A good sized cart to be sure. These numbers could be reduced by adjusting the size of the parts that make up the cart if you wanted a smaller version.

This is a closer view of the top surface of the cart with the counter sunk holes for mounting the top surface. I was just a bit happier with doing this mounting this way as it gave the top a nice look and worked well with the added bracing on the underside of the top.

Here's what the underside of the top looked like with the additional bracing strips that I had installed to the cart. The pocket holes were there as well but realized as I said earlier that this would not work so the bracing strips were needed to get it all to work.
Well that's it for this year. Another great project and a great year. I'll be happy to bring in the new year and with it some more great new projects. Have a happy New Year in your shop as well.
The Tinkers Workshop: Last Project Of The Year..... The Utility Cart Project >>>>> Download Now
ReplyDelete>>>>> Download Full
The Tinkers Workshop: Last Project Of The Year..... The Utility Cart Project >>>>> Download LINK
>>>>> Download Now
The Tinkers Workshop: Last Project Of The Year..... The Utility Cart Project >>>>> Download Full
>>>>> Download LINK Yz