
I am happy to report that I was able to put the finishing touches to my Scrooch gun project this morning. Not a terribly difficult project with only a few modifications to get the kinks worked out here and there on the design. So let me show you how it all turned out.


(Click on the images for a larger view)
As I stated in my last post about this project I was not able to get the word "Scrooch" put on the side of the gun. Simply because the lettering was way to small to get it to work out. I would have needed an electron microscope to get it cut out and then laid down the way I wanted. At least that's the way it seemed at the time. So I opted for a simple lightning bolt in bright yellow instead. It looks to be a good choice for this 50's style space gun.

The details that show up in the photos of the gun turned out very well. I was a bit worried about the red trigger being as smooth as I wanted it to be and am happy with my efforts on that detail and it's installation. Very clean all the way around.
The pistol stands 7" tall and is 10 3/4" long from front to rear. Overall weight of the Scrooch gun came in at exactly 12.5 oz. So it has a nice solid feel to it when you pick it up. There are only two bolts that hold the pistol grip to the body of the Scrooch gun and a threaded rod that runs through the entire length of the body to hold the canister (shaving cream can), 3D printed parts, red discs, and clear dome nozzle all together.
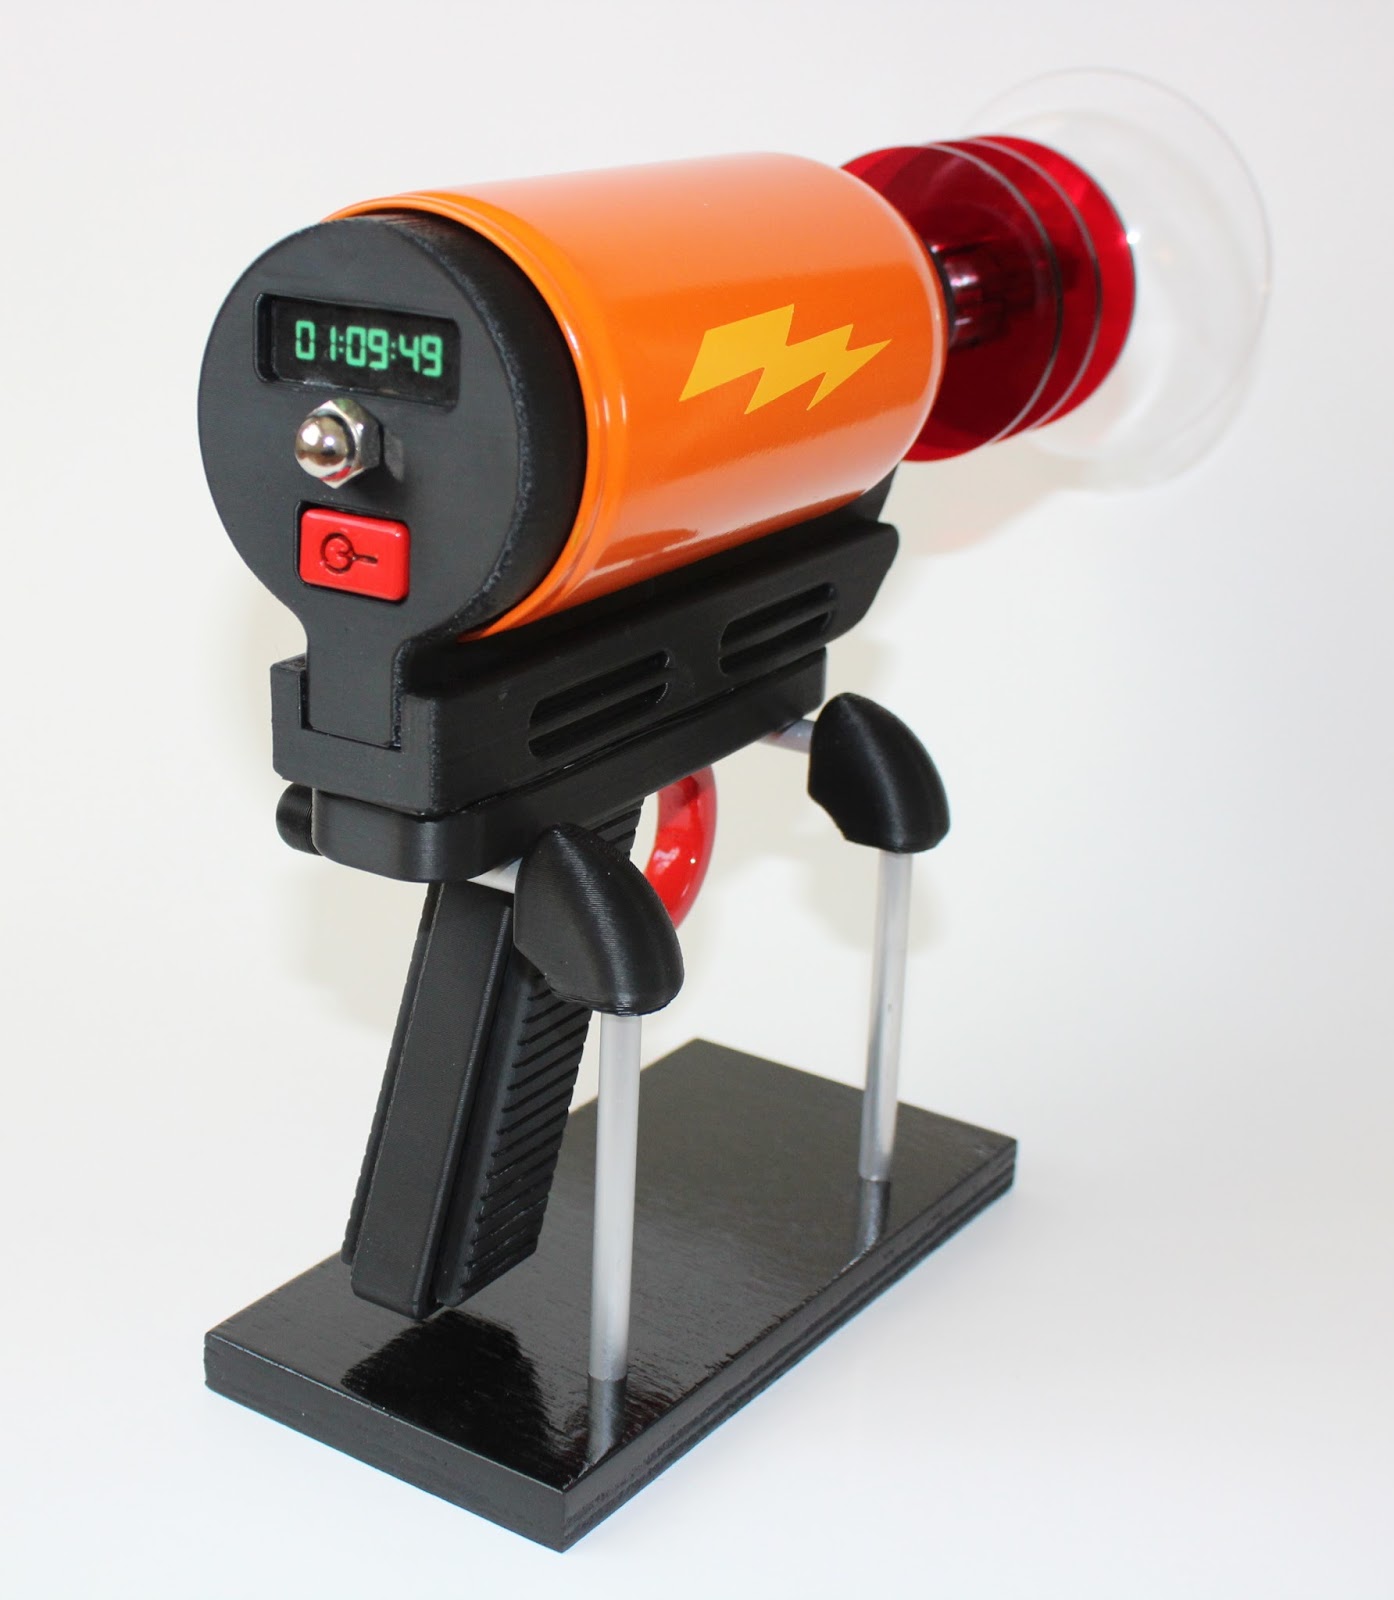
The rear of the gun worked out very well also. I like the digital display along with the red on/off switch. It gives me ideas for another pistol but next time make it actually functional. Not as a real weapon of course but as having a real digital display with a trigger that when pressed would make a space gun sound. Then add in LED lights that flash at the front of the gun to top it all off. All of the electronics to make it all work could be housed in the large canister that you see here or something like it. Something to think about for sure.

I took a load of photos this morning to get various angles of the Scrooch gun shot for this post. Out 45 photos the ones you see here are what I felt were the best of the lot. They give you a good idea of the overall look and detail of the pistol.

Here's another good shot of the rear of the pistol with the digital display and the on/off switch. The digital display was simply printed on my computer printer and then covered with clear packaging tape to waterproof it. I then glued it into the cavity you see here. Turned out better than I had hoped. The red on/off switch I 3D printed and then sprayed gloss red. The black inset to make the on/off emblem on the switch was designed into the part and with the part being black to start I was lucky enough to have still stand out after I painted it red.

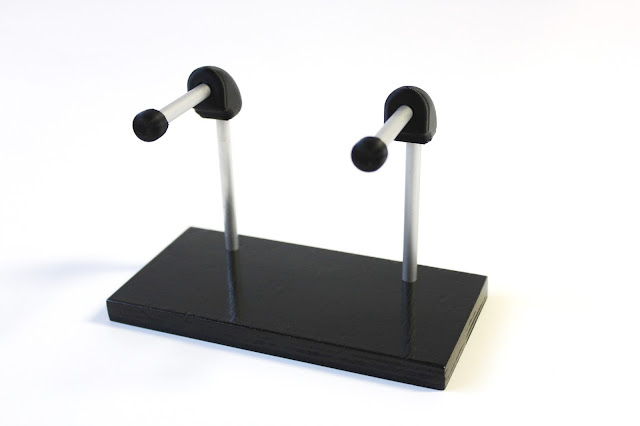
Lastly I wanted to show off just the display stand itself that I put together for the project. The base is nothing more than a well sanded piece of plywood that I primed and painted gloss black. The vertical and horizontal pieces that make of the support arms for the display are 1/4 aluminum rods and the black connecting parts on the support arms are 3D printed parts that I designed and made with my 3D printer. The base only needed to be drilled to receive the support arms and the arms themselves were simply super glued together. A very solid and clean looking display stand.
That's about it for this project. Now I will have to find nice little corner of my workroom or living room to display my latest creation. Enjoy the photos and have a good day on your latest project.
No comments:
Post a Comment